Monday, January 25, 2010

Six Steps to Create an Excellent Concept Idea - Concept Development Tutorial

Summary of Concept Development Research Project:
[Introduction]: Why Design Students Need to Learn Conceptual Development?

Excellent Design = Excellent Concept + Excellent Craftsmanship

Excellent design is excellent ideas and excellent expression of these ideas.  A thorough design education requires educating students in mastery of craft and mastery of concept.
Excellent craft without excellent concept results in an aesthetically pleasing piece of art but, without meaning or purpose.


Excellent concept without excellent craftsmanship leads to good ideas poorly communicated.  Design students should not only be educated in craft less they only become excellent craftsmen.  Half of their design education will be absent.  When mastery of craft is combined with mastery of ideas design reaches its full potential.  Excellent Content and Excellent Form create Excellent Design.
Six Steps to Creating an Excellent Concept Idea:


"dialog can trigger concepts worth creating, ideas that need to exist" j.rosetto

Saturday, January 2, 2010

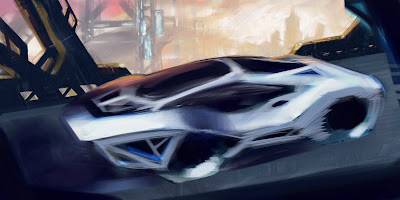
Digital Painting Tutorial - "The Bridge [Transfuturism III]"

Here's a Step by Step Process of how I work on a painting:

Phase I - Concept + Research [Preparation]
[0.0. Concept:] Before I start doing any actual drawing or painting I brainstorm ideas for what the subject matter and message of the piece is about. This is the concept and for me is the most important part of the entire process. Starting with a strong concept is the foundation for everything that follows. I aim to define the concept with a few sentences. This is determined by the brief, or project goal, or story. In this piece the initial concept was "Futuristic sci-fi scene featuring a vehicle inspired by a classic automobile."
[0.1. Concept Refinement:] Starting with the initial concept i define the specifics of the story. For "Futuristic sci fi scene " I decide to choose a sunset on a bridge, and the vehicle will be inspired by Paulo Martin's 1970 Ferrari Modulo.
[0.2. Concept Research:] Once the concept specifics are defined I research the elements included in the piece. For this specific painting I gathered photo ref of bridges, sunset lighting, and the original 1970 vehicle.
[0.3. Thumbnail sketches:] I do thumbnail design sketches for all the main elements in the painting: the scene comp, the design of the elements, and the main vehicle. The design of the individual elements also communicate the story of a futuristic scene, so each element is designed to appear as something that could exist but doesn't yet for the year 2040.

Phase II - Painting Rough Block In
[1.1. Initial Comp:] Starting with monochromatic values I place the main elements of the painting. The general linear perspective and camera angle are also set. Dramatic lighting is also used to control the areas of contrast to set up the focal points. Using the rule of thirds, I place the front wheel and headlights at the vertex of the bottom left thirds. I set up the lighting conditions to create the highest amount of contrast of value and color in this area. Monochromatic values are used to create depth with atmospheric perspective using a limited value range in the Background [light values 2-4], Middleground [full values 0-10], and Foreground [dark 7-9]. Thinking about color theory I establish a simple foundation for a complementary color scheme of warms and cools [orange vs blue]. All of the previous thumbnail designs for the elements are also used in this step.
[1.2. - 1.3. Comp Refinement:] First I flip the entire image to get a new look at what i have so far. I start defining the shapes in the bg thinking about how they relate to the rest of the painting. I create a secondary focal point by silhouetting a future city in the opposite third relative to my focal point, then I use the large sweeping curve of the bridge to lead the viewer back into the foreground where my main focal point is. I'm also using the warm lighting of the sunset in the bg and cool shadows in the fg to separate the bg from the fg. I also squint to check the value arrangements and see if the main shapes are working.
I add a small bit of preliminary lighting effects to test my ideas of the headlights and front corner as the main focal point. I check what i have done so far and decide its time to move on to the next phase.


Phase III - BG Rendering
[2.1. BG City + Bridge:] From here on out I'll mostly be rendering. My approach to digital rendering is a hybrid of techniques from traditional oil painting process [working bg to fg, tightening up in focal areas, controlling edges and gradients to make forms read], and the techniques offered by new technology [adding details and lighting effects].

After all the rough ins I begin finalizing the bg. My goal is to indicate a future city and bridge without actually completely rendering it. The purpose of this being not to distract from the main focal point that I will fully render later. I've increased the saturation and grouped the shape silhouettes to make them more dominant as a shape. I use a small amount of color shift to create depth of the bridge coming forward away from the sunset behind the city.
[2.2. - 2.3. MG Bridge Rendering:] I fix the linear perspective from the previous step to define where the corners of the road are relative to the vehicle. I change the design form language of the structural elements of the Mg bridge seen in the upper corner to something more experimental and not seen today. I also change the design to to have dominant structures with subdominant rails or beams to create more interest. I use hard edges to define the shapes and highlight the corners of the forms with the warm light of the sunset. The changes I make to the vehicle are just place holders to remind myself of where I'm going later on in the painting. With the Bg and secondary elements 90% complete I check what I've done so far and move on to the focal point, the vehicle rendering.

Phase IV - Focal Point Vehicle Rendering
[3.1. Wheels:] The wheels are created using the ellipse tool as a guide to get the series of crisp concentric ellipses. I also keep in mind the lighting direction as i render. I only create one then duplicate and transform the other. Place both according to the pre existing perspective grid lining up the minor axis of both wheels to the vanishing point outside the image.

[3.2. Main Vehicle Body:] A simple step using value changes to show the form changes as the forms turn away from the light. I use mostly a digital airbrush with 10-30% opacity to build up values. I also don't worry too much about the edges as I'll clean everything up in the next step. The goal is to just get the main form changes to read.
[3.3. Defining Forms Using Edges and Values:] Continuing from the last step I use a hard edge brush with higher opacity to increase contrast and harden the edges to create crisp form changes. I also add the warm highlight on the far side of the vehicle and a hard edged reflective highlight to indicate the glass material change. The glass highlight is placed representative of the cool light source illuminating the front corner. I then use a smaller brush to add some of the smaller highlights and details. Lastly I indicate the wheels turning with a few brush strokes. When I'm satisfied with how all the forms read I move on to the last phase.

Phase V - Detailing + Effects
[4.1. - 4.3. Paint Stripes, Lights, + Textures] I add a paint stripe with a hard brush and create a headlight pattern using a light fx brush [glow-painter/colordodge-ps]. As I do so I'm thinking about my composition and remember why I set up the image in this way. I want the front corner to be my focal point so it should have the most value change[full range 1-10], clearly defined forms, and most color contrast [adjacent complementary colors]. I add some minor textures to the various surfaces using a hardlight layer with very low opacity to add some noise and variation to surfaces and some subtle warm light near the rear of the vehicle and cool light near the front. A minor touch is a bit of motion blur in very limited areas [near the wheels, on the road]. Everything is finally coming to an end. All that preparation work was for this moment.
The Finished Painting
[Final:] I flip the image once more, add reflections on the ground by duplicating and lowering opacity of the new layer, and add some final brush strokes just for my own taste, and its finally done - a full finished painting. Of course I can always go back and make changes but for now I consider this piece done and I don't have any more time to spend on it.
Thanks for reading this far. I hope this tutorial was helpful and enjoyable!

Friday, August 14, 2009

How to find an ID job [via-core77]

A useful, simple and insightful article on applying for a job....I think I would also add the necessity of networking though since more often than not jobs come from who you know in design fields.

original article:http://boards.core77.com/viewtopic.php?f=3&t=19771

As an employer we have been frustrated with the poor applications that we have received recently. Here are some of the most major errors we're seeing:

1.Poor grammar, lack of capitalization, typos, poor spelling, and no indication of which job they are applying to. Even if English is your second language, use spell check and grammar check! Ask friends to look things over. Craftsmanship is key.

2.Individual jpgs sent as samples. There is no way we are opening 10 attachments, period. Sorry. You've been rejected. Next!

3.Calling when the ad says no calls - this is a variation of the less common but more annoying version of the, "I'm just stopping by, can you see me now?"

4.No sketches or background material in your portfolio.

5.Not following pretty basic instructions in job wanted ad on how to apply

Here are the ingredients to a great application: Cover letter, Resume, and Samples
Cover Letter - research the company and write a personalized letter. This can be the email that you attach your resume and samples to. Please tell me in this letter which job you are applying to - DUH! I don't care why you want to move to my city (I don't care that your girlfriend live here) but I do care about why you think you are right for my company.

Resume: Please keep this to one page unless you have tons of experience. Sponsored studios don't count as experience, sorry. Include a graduation date. My last post was for a true junior designer. I had juniors trying to appear as if they had 3 or more years of experience. I disqualified those people. Too bad. Be honest.

Samples could be a teaser or a complete portfolio:

Teaser: 1 project with support work or 3-4 projects in final form

Complete portfolio: Should consist of 3-4 projects (minimum 3) from start to finish. You should document your thinking and decision making process from start to finish. We are looking for how much exploration and research you did, mechanical ability, aesthetics, and sensitivity to the user. We want to see the bad ideas you rejected as well as the really crazy ideas your instructor thought were too blue sky. We also want to see your mock ups. We are looking for your visual communication skills - this means sketching. If you can't sketch, it's still better to include your thinking than to not include it.

Portfolio Advice From Luciano Bove:
http://www.designertechniques.com/designers/lucianobove1.htm

Concept Art Portfolio Advice from Feng Zhu:
http://www.fzdschool.com/announcement_features_article16.htm

Design Sessions Portfolio Advice:
http://training.sessions.edu/resources/interviews/interviews/nomi_altabef.asp

Wednesday, August 12, 2009

Creative Strategies Icons + Micro Projects

Intro: This is a sample of work from Creative Strategies, one of the best courses at accd. The goal of the class is of course learning to be more creative and developing better creative processes to solve problems. Each week we are given a creative/ design challenge and we then have one week to solve it as creatively as possible.


Creative Strategy Icons: I created these to help keep track of my own mental processes and also to quickly communicate to an audience how i was thinking at a certain phase in the design process. The strategies are fairly loose so actually there are infinite variations within these themes for creativity.


Seven Day Journal: The task was to create a journal with the theme "What is left of the Day?" The creative strategy i used in this case was problem framing to redefine what it meant to experience a day. For me one day was a beginning and an end and this is how i see the completion of a sketch book. So one day for my journal is one completed sketchbook.


Copic Sketch Chess Set: This challenge involved using repurposed or recycled materials. One of my other accd nicknames besides "Stephensanity" is "The Recycler." This is because you will often find me during crunch times digging through trash or repurposing materials to create last minute projects that turn out relatively well. This is one of those cases. Time was less than three hours to concept and final execution.


LEGO Futurist Farm Track-Tor: Final challenge was to create your own strategy and project. I've been wanting to do something with LEGO for a long time so i finally did for this project. My self project was to create and model my own genre of LEGO. I called my strategy "let GO" applied to "LEGO." "LetGo" means trusting all your training and life expierience to create something that is orginal and good. We train as designers to be good so trust your skills, draw from your unique life experiences and have faith that whatever you make will be unique because your life is unique. And it will be good because you've been trained well and have all that practice under your belt.

note to self: do some sketches and put LEGO project into book..integrate LEGO into design process

Saturday, July 11, 2009

Paintings II

Intro: All of these paintings were done for the inspiration/passion/fine art section of my portfolio during 6th semester Viscom with John Krysteski.
They were created in Corel painter X using mostly the palette knife brush. The process of searching through automotive design history, seeing and experiencing all the great designs from the past and adding my own interpretation was one of the most enjoyable things for me. I think this series of classic paintings gave me a chance to go back and visit my roots from my old oil painting days. I used the same process i would as if i were doing a landscape. It's scary, with that kind of traditional painting process, i had to have faith in the process of loose to tight, general to specific. All of these paintings look like they are not working until the final thirty minutes when i tighten everything up and add the final touches that bring it all together.


M1 Allnight - 07/09
Process+Context: This is definitely my favorite painting of the classics' series. I worked on it for 10 hours straight from 8pm to 6am the next morning (Hence the title "M1 Allnight"). During that time i didn't care about anything else except painting this piece. I was focused and didn't worry about any of the other work i had to do that night. I had the feeling that artists sometimes get of being "in the zone" and i knew it would be one of my best. A lot of the time went into arranging the composition and wrestling with the color theory. I was inspired by the strength of the iconic BMW motorsports racing stripes and for some reason just really wanted to do a dramatic painting of this iconic motor vehicle. When i'm older i think i'll look back at this one and i think i'll still like it regardless of what anyone else says.


Pininfarina P5 Saturday Post - 08.09
I had this car in mind for a classic painting for a few weeks before i got to it. It was one of the last ones i did. Looking at my other paintings and the energetic/ heavy brush work style i used in them didn't seem to fit this one. With most of the other paintings my autopilot style is high energy and drama. For this one it felt like the mood should be something like the flavor of vanilla - smooth and comforting. Almost like a Norman Rockwell painting as opposed to a Sargent (both of whom i find much inspiration in painting).


Countach Noir - 08.09
Another scary painting. Scary for me cause it didn't look like it was gonna be working till the last fifteen minutes and scary in tone in general. The Countach is one of the few iconic autos that have an even more iconic aerial view. I imagined this being driven in some Italian Crime Noir film, by the hero or the villain escaping through the night chasing someone or being chased by something unknown.


Porsche Legacy - 08/09
This was originally just one part of a larger painting dealing with all the iconic vehicles in the Porsche marque's history. After spending two hours on the portrait of Ferdinand Porsche i realized it was not going to be economical time wise and decided to save that painting for a later date. I usually paint the car as the focal point of the painting, but in this case i wanted to try something different and left the car loose and made the portrait the focal point. It was good to practice my portrait painting skills that i haven't used in three years.